Okay - so I’ve had a few people ask me over the years about how to do this, and I was also horrified to see suggestions of using a Stanley knife to do this…
So I’m going to go through the simple process of taking apart the standard PS1 Jewel case and how to put it back together. You only need one tool - a nylon spudger like this.
Tools
I would recommend picking up a pack of 5 from eBay or somewhere for about £/€3-4. They are a useful tool to have as their soft plastic is unlikely to damage anything. They’re also really good at helping to remove thick sticker residue!


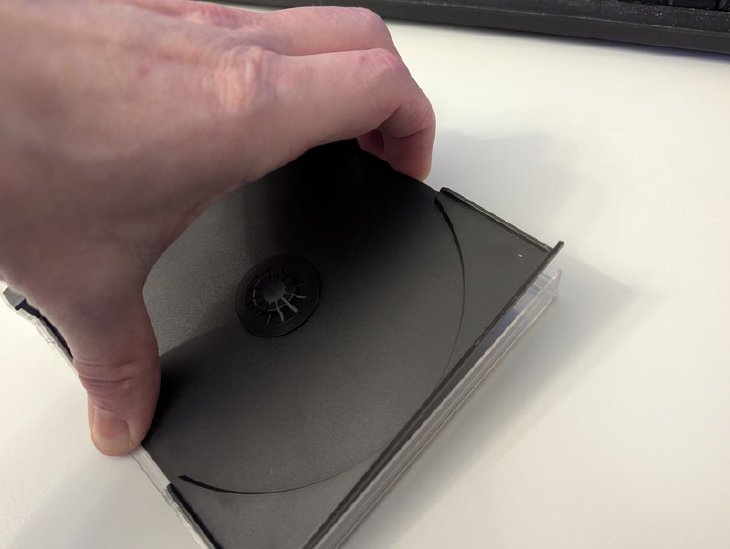
Releasing the Black Plastic Disk Tray
The main part of the Jewel case is the black plastic disk tray. This not only holds the CD in place, but it also covers the rear inlay and locks the front clear plastic leaf into the rear one. To remove this disk tray you will need to locate the four locking holes on the rear clear plastic leaf. These are located around 20mm from the outer edge on both the top and bottom of the case.
To release these, stick the flat end of the spudger between the black tray and the clear leaf. You’re not going to apply much force and will only aim to get it in less than 1mm.


Once it’s slightly in, attempt to rotate the spudger outwards from the case and this should lift the disk tray free from the retaining clips.


Doing this to both points on the top or the bottom should allow the tray to become free.!
Separating the Front and Rear Clear Plastic Leaves
This can be a tricky thing to separate as the hinges are quite fragile on these cases. One immediate thing to look out for is if a single hinge is looser than the other. If this comes out free easily, it can apply a lot of pressure to the remaining hinge. Most case leaves will just come apart without any issue but some cases you’ll find more locked together.


The best technique I’ve developed to separate stronger hinges involves holding both leaves firmly and slowly opening oscillating the case open and shut. Applying a small amount of separation force while doing this can easily detach the leaves in 4-6 things.
Reconnecting Two Clear Plastic Leaves
This needs to be done between a front clear plastic leaf and rear plastic leaf that does not have the disk tray inserted. Safest method would be to place the rear leaf on a flat surface, and place the front leaf on top, aligning the case hinges. Once this is in place, slowly apply downward preasure on both hinges until they both click into place. You can then test opening up the case, though keep in mind that the hinges may come loose still as the disk tray is required to lock this in place.
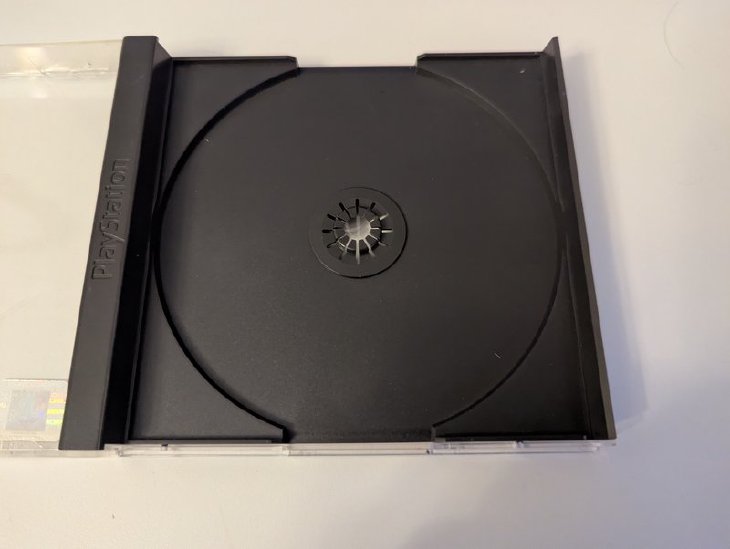
Inserting the Black Plastic Disk Tray
With your two plastic leaves connected at their hinge, carefully open up the case place on a flat surface.
The rear leaf should be on the right and the front on the left.
Ensure you’re happy with the contents on the rear inlay (is it upside down?)
Then gently place the disk tray on the rear leaf, with the PlayStation logo on the hinge side (left)
Gently press down on the four corners until all four retaining clips gain a bite on the tray and it’s in position.
Removing a Front Leaf Second Disk Tray
Some games with two disks came with a second disk tray inserted into the front leaf. This is easier to remove than the main disk tray and they do have a tendency to fall out on their own. These disk trays also have four points where they attach to the clear plastic leaf. First thing to do would be to open your case up and place it on a flat surface. Apply a small amount of leverage pressure between the disk tray and the clear plasic on either the top or bottom left (outside). Make sure you’re not damaging the front inlay if you’re inserting anything long into this section. You can additionally apply a small amount of outward torque to the top or bottom, frosted plastic.
Inserting a Front Leaf Second Disk Tray
Similar to the main disk tray, you can open up the case, on a flat surface. Gently place the disk tray on top of the front leaf, with the artwork between the two. Ensure that the open side of the disk tray is left and right. Apply a small amount of pressure to attach this to the clear plastic.